Wireless-Network: Setup for Windows Vista
To connect to the Emalus Wireless network while using Windows Vista, do the following:
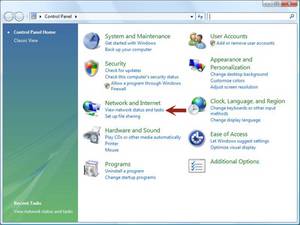
1. Go to the Start Menu, then Control Panel, then “View network status and tasks” under “Network and Internet” (or open the “Network and Sharing Center” icon if you are in the Classic control panel view).
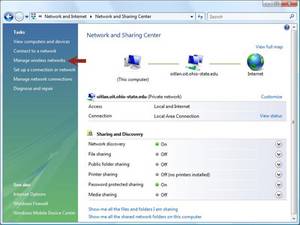
2. Click the “Manage Wireless Networks” link at the left.
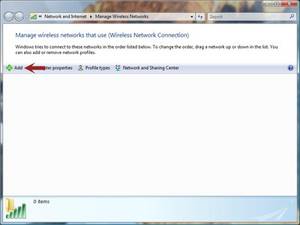
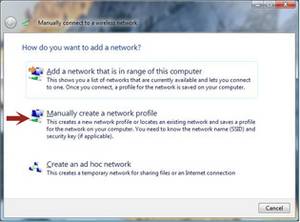
3. Click the “Add” button.
4. Choose “Manually create a network profile”.
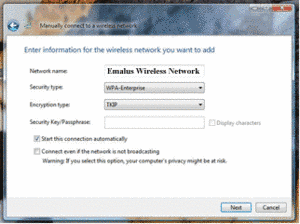
5. Enter the network connection information and click Next:
6. Network Name: Emalus Wireless Network
7. Security Type: WPA-Enterprise
8. Encryption Type: TKIP
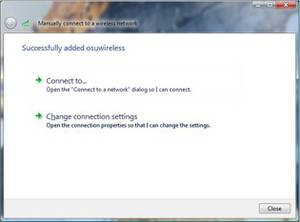
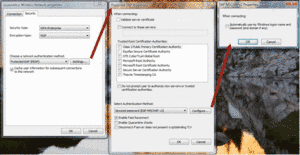
9. Click “Change Connection Settings”, then click the “Security” tab in the next window.
10. Set “Choose a network authentication method:” to “Protected EAP (PEAP)”, then click the “Settings…” button.
11. Uncheck “Validate server certificate”.
12. Click on Configure…
13. Uncheck “Automatically use my Windows logon name and password”, then click OK until you are back at the “Manually connect to a wireless network” window
14. Click “Connect to…”

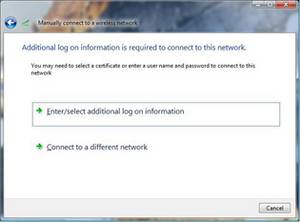
15. Select the Emalus Wireless connection, then click “Connect”.

16. Click “Enter/select” additional log on information”, then enter your Emalus username and password with domain STUDENTS or VANUATU if you are a staff, then click OK.

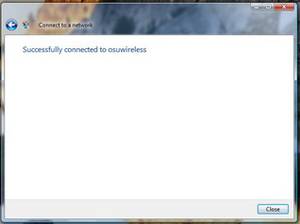
17. You should now be connected to the Emalus Wireless network.